Introduction
Let’s dive into the world of aerodynamics with a simple paper airplane.
Sounds easy, right?
But here’s the twist: you can only use your wrist to throw it. No elbow or shoulder movement is allowed. Bet you’re wondering, “How can my paper plane take an epic flight with such a limited launch?”
It can be tough to teach kids about physics, but you can make learning fun with this amazing STEAM engineering project!
Let’s unravel this mystery together! This activity isn’t just about flying paper planes. It’s a hands-on exploration of physics in action, a mini-adventure into how forces work, and a lesson in problem-solving.
Key Concepts This Activity Shows
Hey there, amazing parents! Today, we’re getting hands-on and a tad geeky – but don’t worry, it’s all heaps of fun. We’re building a paper airplane launcher with the kiddos. Not only is this super fun, but it’s also a brilliant way to teach our little ones about the fascinating world of physics. Trust me, it’s not as scary as it sounds!
Let’s break down the cool stuff they’ll learn:
- Physics: This is simply how things move, stop and change direction. When our paper airplane zooms through the air, that’s physics in action!
- Speed: Ever played ‘how fast can your airplane go’? Speed is all about how quickly something moves. We’ll see it in action when we launch our planes.
- Lift: This one’s a bit magical. Lift is what makes our paper airplane defy gravity and soar up high. It’s like an invisible hand lifting the plane in the air.
- Potential Energy: This is the ‘could-be’ energy. When we pull back our launcher, we’re building up potential energy. The more we stretch, the more energy we’ve got stored for our flight.
- Kinetic Energy: This is the ‘let’s go’ energy! When we let go of our loaded launcher, all that potential energy turns into kinetic energy, sending our plane zooming off.
- Engineering Design: Now this is where it gets creative. We’ll plan, build, test, and tweak our launcher. It’s problem-solving and fun rolled into one!
Isn’t it amazing how much learning is packed into this one fun activity?
You can also encourage your child to write down their findings after each time they launch their paper airplane. This is a good way to get a conversation started about what they think will happen, and then record their findings!
So, roll up your sleeves, grab those paper planes and let’s dive into the world of physics, headfirst and giggling!
For The Parents: The Science Behind This Activity
To soar the skies, an airplane must generate sufficient lift, an upward force due to air pressure, to counter its weight, the downward pull of gravity. The key? Speed! The faster an airplane, the greater the lift.
This explains the mile-long airport runways, as planes require ample space for speed buildup and safe landing.
Enter aircraft carriers, and colossal ships equipped with runways. Despite their impressive size, compared to land-based runways, they’re quite compact. The largest carrier is barely over 1,000 feet—a quarter mile at most! So, how do planes take off and land on such short runways? The secret lies in an ingenious device—a catapult.
Contrary to the medieval contraption flinging stones at castles, this catapult is a sophisticated mechanism using compressed air or electromagnets to launch planes, providing the extra energy required for takeoff over a shorter distance.
In our project, we’ll use a simple rubber band to store potential energy, transforming it into kinetic energy to propel a paper airplane. This rubber band catapult is a game-changer, providing an impressive boost that makes your wrist launch look like child’s play! So, gear up for a physics-packed adventure!
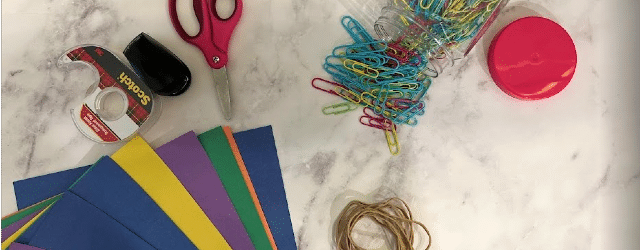
Materials That You’ll Need
The good news is that this activity doesn’t require many materials. This means that you and your little ones will be able to test different paper airplane models and see how different designs impact performance.
Experimenting at it’s best!
However, you will need a few materials to get started:
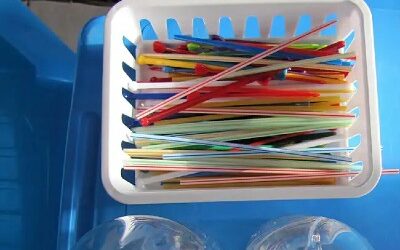
- Paper: The star of our show! Any paper will do – even the ones with kiddo’s doodles.
- Rubber bands: These give our planes that awesome launch power. Raid that junk drawer, I bet you’ll find a few.
- Pen or pencil: For marking and sketching our launcher design. Let’s hope the pen isn’t hiding today.
- Paper clips: Tiny but mighty. They’ll add some much-needed weight to our planes.
- Tape or stapler: Because what’s a project without some sticking together?
Instructions For This Activity
Alright, my wonderful parents, it’s time to turn our kitchens into fun physics labs. Here’s our step-by-step guide to crafting a DIY paper airplane launcher. No worries, it’s simple and totally fun!
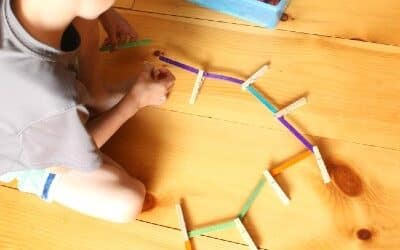
- Start by making a couple of paper airplanes. Yes, they might get a little squished or damaged in action, so let’s make a few extras. Remember, they need to be identical for our experiment.
- Stick or staple a paper clip to the nose of each plane. Make sure it points backwards, acting like a hook for our rubber band. Give it a good tug to ensure it’s secure. We don’t want our planes losing their noses mid-flight!
- Try launching your paper plane with a full arm swing. Notice how far it goes. How much are you moving your arm?
- Let’s switch it up. Try launching your plane with just your wrist, keeping your shoulder and elbow steady. How does the flight compare now?
- Here comes the fun part! Let’s make a simple catapult using a pencil and a rubber band. Attach one end of the rubber band to the pencil (near the eraser) and hook the other end to our plane’s paperclip nose. Pull back, aim, and let go! Notice how far it flies now and how much you had to stretch the rubber band.
- Let’s now craft a more robust launcher. Think about your design – it should support the rubber band, withstand the pull-back force, and ensure the plane doesn’t get stuck during launch. Sketch a few ideas before choosing one to build.
- Time to bring your sketch to life. Don’t worry if it doesn’t fit together perfectly, that’s all part of the process. Try different materials and designs.
- Keep refining your launcher. Test, improve, test again. That’s what engineers do! How does the flight distance now compare to your arm and wrist throws?
How To Make A Paper Airplane Launcher
Building a paper airplane launcher, be it from robust wood or flexible cardboard, introduces an exciting blend of engineering and aerodynamics.
The process invites endless fun and satisfaction for the young inventors as they see their handcrafted paper planes take flight. Without delving into details, let’s say, these launchers offer a thrilling hands-on learning experience that combines playtime with science, promising memorable moments of achievement, laughter, and discovery.
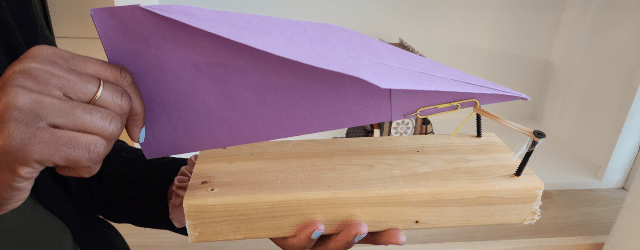
Design 1: 2×4 & Rubber Bands
Outwitting my husband’s growing lumber graveyard, I purloined a few sturdy 2x4s for a crafty aviation project with the kids.
A paper airplane launcher is an amusing solution to the ‘wooden’ problem! It’s simple, really. You need two 2x4s, some screws, and an energetic rubber band. Picture this – we embarked on our mission on one unsuspecting afternoon, armed with a smirk and a screwdriver.
Like mad scientists, we united the lumber pieces and stretched the rubber band. The flying results had us in splits. Who knew re-purposing scrap wood could launch so much laughter and paper planes?
Materials Needed For A Wooden Paper Airplane Launcher
- A short 2×4 piece of wood
- Two screws
- Several rubber bands
- Screwdriver
- A paper airplane
Please be aware that working with tools like screws may require adult supervision to ensure safety.
Step-by-step Instructions To Make Your Paper Airplane Launcher
- Prep your 2×4 piece of wood: Make sure the 2×4 is sanded and smooth to avoid any splinters. The length of the piece will depend on the size and power of the launcher you want, but a piece about 12 inches long works well.
- Place your screws: Decide on the placement of the screws. They should be placed about half an inch from each end of the 2×4, on the same side. This is where you will attach the rubber bands.
- Screw in the screws: Carefully screw in the two screws halfway into the wood using your screwdriver. You want them to be secure but also have enough of the screw exposed to attach the rubber bands.
- Attach the rubber bands: Loop one end of a rubber band around one screw, stretch it to the other screw, and loop it around that screw too. Depending on the thickness of your rubber bands and the distance you want your plane to travel, you can add more rubber bands for increased tension.
- Test the tension: Give the rubber bands a gentle pull to test the tension. It should be tight but not overly stretched. The rubber bands will act as your launcher.
- Ready your paper airplane: Attach a paper clip or small binder clip to the nose of your paper airplane. This will serve as a hook for launching.
- Launch: Hook your airplane onto the rubber bands, pull back, and launch! Try adjusting the angle or adding more rubber bands for different results.
Remember, always supervise younger children when using tools or launching the planes to ensure safety. Have fun experimenting with your new paper airplane launcher!
Design 2: Cardboard & Rubber Bands
Crafting a cardboard airplane launcher, armed with trusty rubber bands, is a simple yet thrilling family project. The story takes a humorous turn when, hunting for building materials, I found myself faced with a heap of scrap lumber, courtesy of my husband’s latest DIY endeavor.
However, I decided to stick to lightweight cardboard, to keep things manageable and child-friendly. In a classic mix-up, I confiscated a few planks of his ‘treasured’ woodpile to add a robust touch to our predominantly cardboard launcher.
The result?
A sturdy, child-safe launcher, and a baffled husband wondering where his spare lumber vanished!
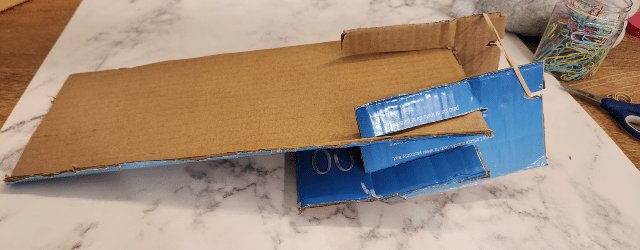
Materials Needed To Build A Cardboard Paper Airplane Launcher
- Cardboard
- Rubber bands
- Scissors
- Tape
Step-by-step Instructions To Make Your Paper Airplane Launcher
- Cut Your Cardboard: Start by cutting two pieces of cardboard. Make them about 12 inches long and 3 inches wide. These will be the arms of your launcher.
- Create the Launcher Arms: About 2 inches from one end of each cardboard piece, cut a small notch. This will hold your rubber band in place. The notches should be big enough for a rubber band to fit snugly.
- Prepare the Base: Cut another piece of cardboard, this should be around 10 inches long and 6 inches wide. This will serve as your base.
- Attach the Arms to the Base: Position the arms on the base so they’re standing upright and parallel to each other, like a giant “U”. The notched ends should be facing inward. Secure them to the base using tape.
- Connect the Rubber Band: Hook a rubber band onto the notches of each arm. If your rubber band isn’t long enough, you can link multiple rubber bands together until you get the right length.
- Launch Time: Slide your paper airplane between the two arms of the launcher, hooking the rubber band over the back end of the plane. Pull back on the plane to stretch the rubber band, then release to launch!
Talking Points To Consider
Engaging with your kids during educational play like building a paper airplane launcher is essential for their learning and development.
It encourages curiosity, reinforces concepts, and builds strong connections. Conversations during these playful moments can open doors to a world of imagination and understanding.
It can be tough to figure out what to talk to your little ones about as you launch paper airplanes, so here are 10 thought-provoking ideas to foster dialogue as you embark on this aerodynamic adventure together.
- What is Physics?: Start off by explaining that physics is the science that tells us how things move, stop, and change direction. It’s why a soccer ball rolls when we kick it and why our paper airplane flies when we launch it.
- Understanding Speed: Discuss how speed is how fast something moves. Ask them to guess if the airplane will go faster when launched from the hand or the launcher, and why.
- Explaining Lift: Explain lift as the invisible force that helps birds, planes, and our paper airplanes rise in the air. It’s like an invisible hand pushing the plane upwards.
- Potential Energy – The ‘Could-Be’ Energy: Use the rubber band in the launcher as an example. When we pull back on the rubber band, we’re giving it potential energy, kind of like winding up a spring.
- Kinetic Energy – The ‘Let’s-Go’ Energy: When we release the rubber band, all that potential energy changes to kinetic energy, propelling the airplane forward. It’s like letting a wound-up spring go!
- Angles: Ask your child if they think the angle that they launch the paper airplane will affect tis flight distance. If so, why? Test it out and talk about the results.
- Problem-Solving in Building: While building, if something doesn’t fit right or work well, ask your child for their ideas to fix the problem. Encourage them to try different solutions – that’s the heart of problem-solving!
- What’s Engineering Design?: When we sketch our launcher design and build it, that’s engineering design. Ask your child why they think planning and sketching before building is important.
- Rubber Band Lengths & Sizes: Test how different lengths and thickness of rubber bands impact how far the paper airplane is launched. Why do you think this is?
- Iteration and Improvement: Encourage your child to keep refining their launcher, discussing how iteration is a big part of what engineers and designers do. Celebrate each improvement, no matter how small!
Have Fun Building Your Own Paper Airplane Launcher!
As we wrap up, remember that building a paper airplane launcher isn’t just a fun-filled craft, it’s a journey into understanding principles of physics and engineering in a playful context. Your kids will not only have a blast launching their paper aircraft, but also engage in a hands-on learning experience.
Whether you opt for the sturdy feel of wood or the flexible charm of cardboard, you’re fostering creativity, problem-solving, and some well-spent family bonding time. So grab your materials, rally the troops, and let the paper planes take flight.
Happy building and even happier launching!